How to Make Your G Suite Work Smarter for You (Part 1)
Let’s face it, taming the email monster can feel like a full-time job sometimes. Have you ever had an important email get “lost in the sauce”?
When you start up Gmail on its default inbox setup you see every email is a long overwhelming list. You’ve got your read email mixed in with the unread and frankly its intimidating and not what one would call organized.
Let’s take a moment and think about how you may want to organize your email box. Let’s say you want to be able to tag those emails that you have read but still need to act on as “To Do’s”. We will first need to create a label for that if you don’t already have one.
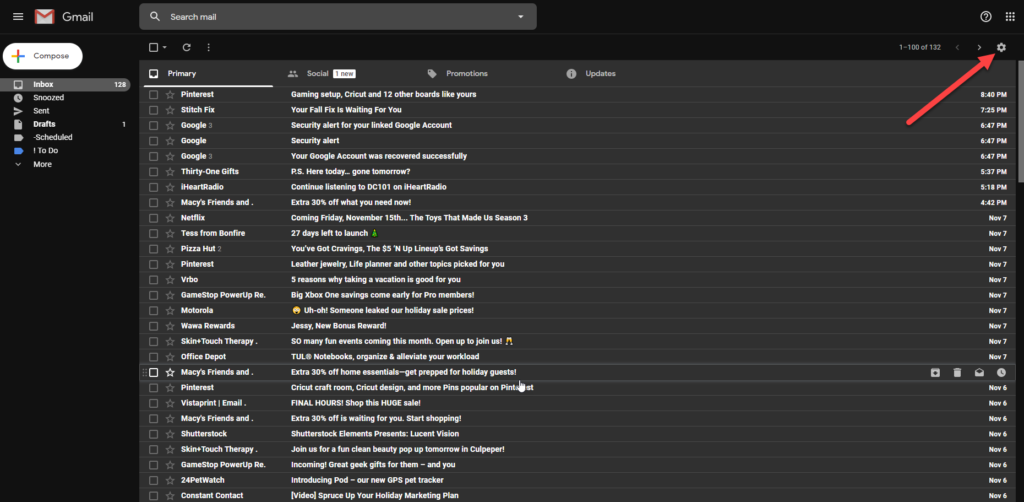
To get your email monster tamed let’s start by logging into your gmail and go to the email settings. You can do this by click the little gear in the top right corner. Then click SETTINGS (figure 1)
Creating Labels to Do the Dirty Work
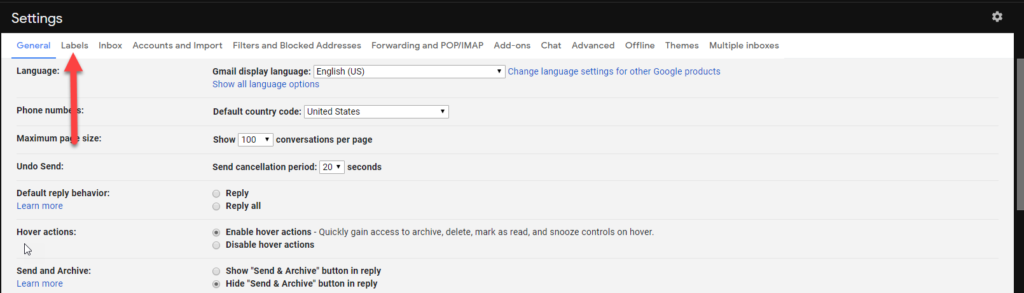
Time to create your labels! From the setting screen you will want to click the LABELS tab (figure 2).
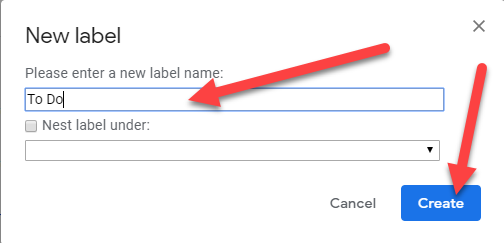
Scroll down your screen until you see the CREATE NEW LABEL Button (figure 3).
Since we are here you may want to create some other helpful labels. Here are some of my favorites:
To Do Leads – Won (Nested under Leads) – Lost (Nested Under Leads) Status – Pending Others (Nested under Status) – Done (Nested under Status) – On Hold (Nested under Status) Clients – Client Names (Nested Under Clients) Appointment Requests
Figure 1
Figure 2
Figure 3
Setting Up Your Organized Inbox
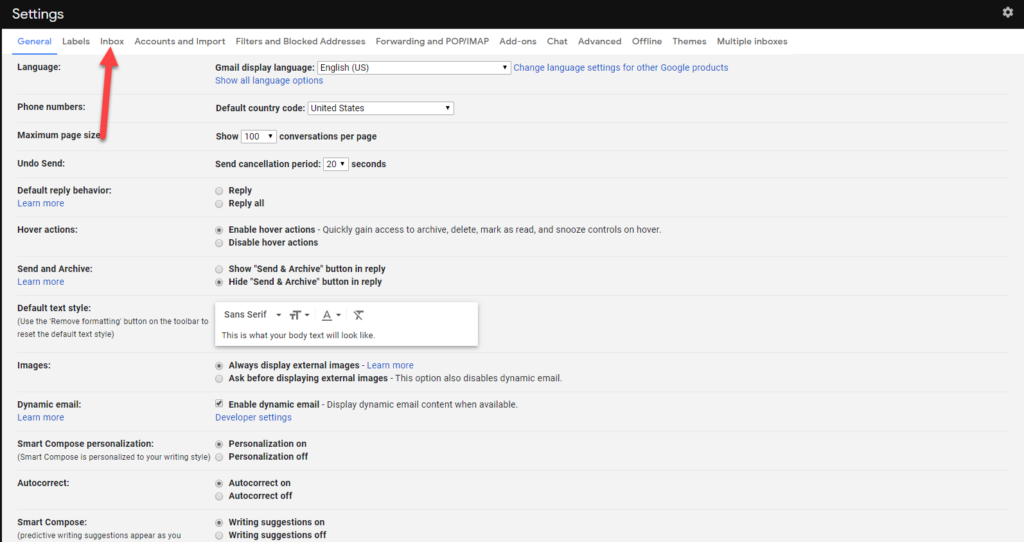
Now that you’ve got your labels setup you will want to click the INBOX tab (figure 4).
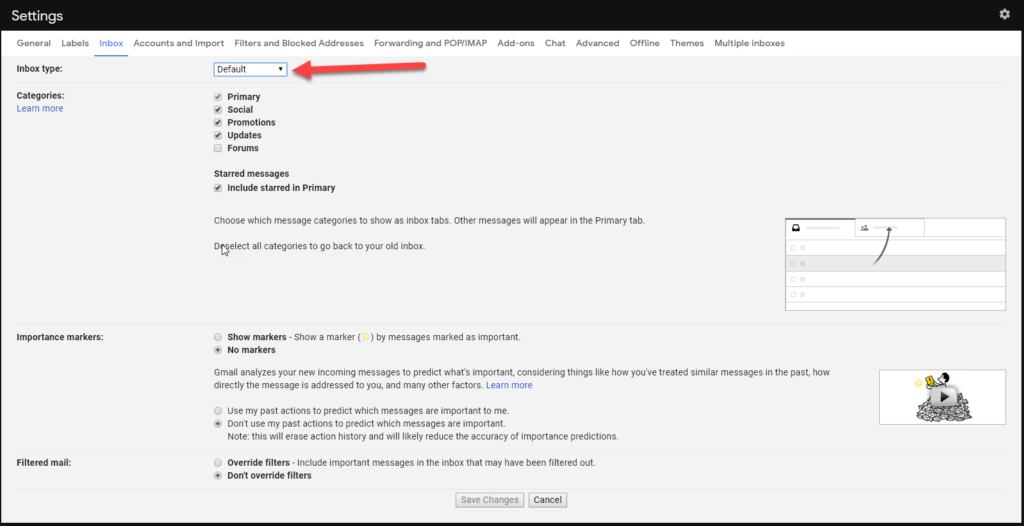
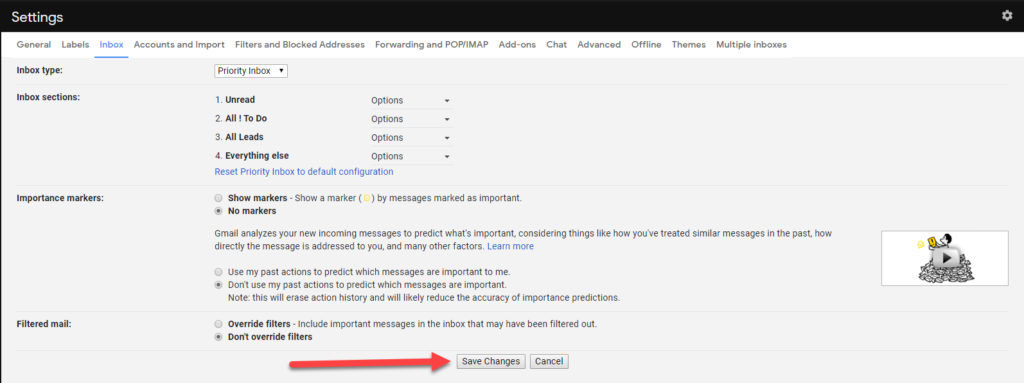
For the Inbox Type drop down select PRIORITY INBOX (figure 5).
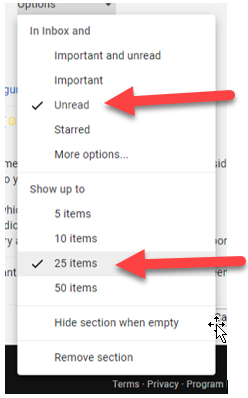
On the first dropdown box next to Unread (figure 6), make sure select the Show up to 25 items to help reduce the chances of you missing something important (figure 6.1).
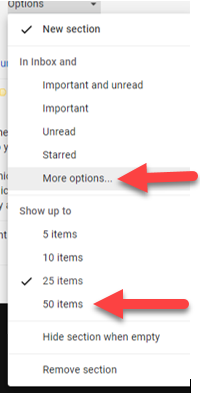
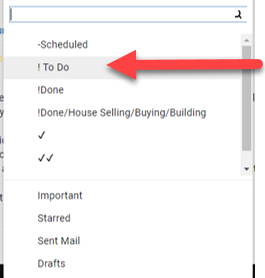
On the next dropdown box, you are going want to select the Show up to 50 items (figure 7), then click the More Options and select the To Do Label (figure 7.1).
You can select up to one more label to display this way in your inbox. For me, I like to use Leads. We will get into more email magic on the next article lead in your inbox.
For now, Click the option dropdown next to Everything else and make sure to show up to 50 items.
Now make sure to save your work and click the Save Changes button (figure 8).
Figure 4
Figure 5
Figure 6
Figure 6.1
Figure 7
Figure 7.1
Figure 8
Tagging/Labeling Your Emails
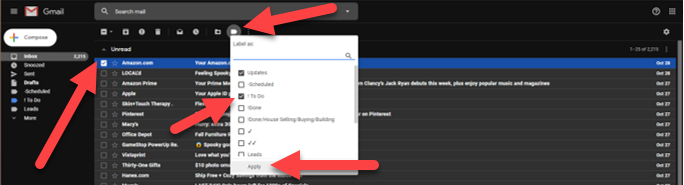
When you see an important email come in whether you have read it or not you can click the little box on the left of the email then click the labels icon and apply the To Do label (figure 9).
If you have the email open and want to add the To Do label just click the labels Icon and follow the same process as you did above to apply the label (figure 10).
Figure 9
Figure 10
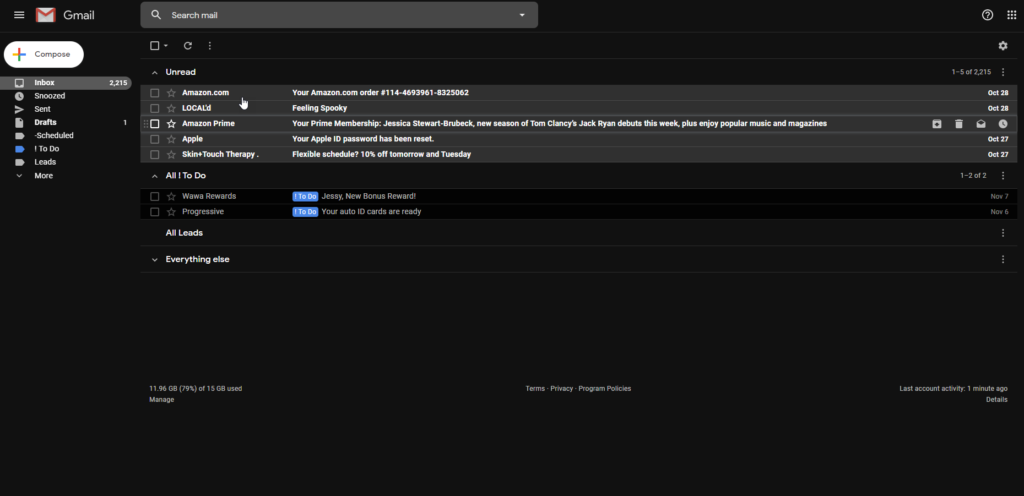
Now check out your mailbox now, much more organized and way easier to manage.