How to Make Your G Suite Work Smarter for You (Part 2)
This is the second part of How to Make Your G Suite Work Smarter for You, if you haven’t read part 1 click here. In part one, we covered creating labels and setup a priority inbox. Now let’s take things a step further.
Creating Email Filters that Automatically add your Labels!
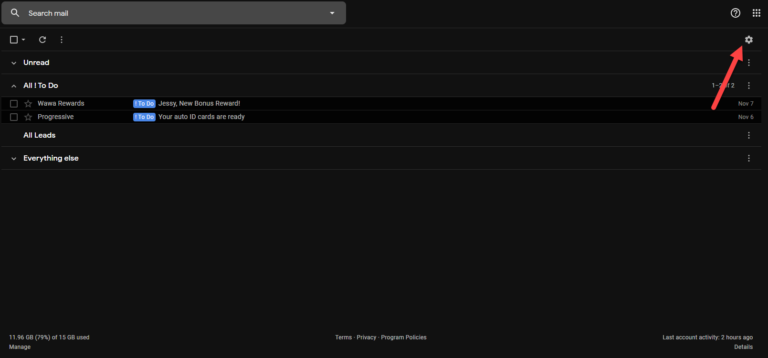
Just like we did in part 1, we are going to go into your email settings by clicking the little gear in the top right corner (figure 1).
Figure 1
Click the Filters and Blocked Addresses Tab (figure 2). Then click the Create A New Filter Link (figure 3).
Figure 2
Figure 3
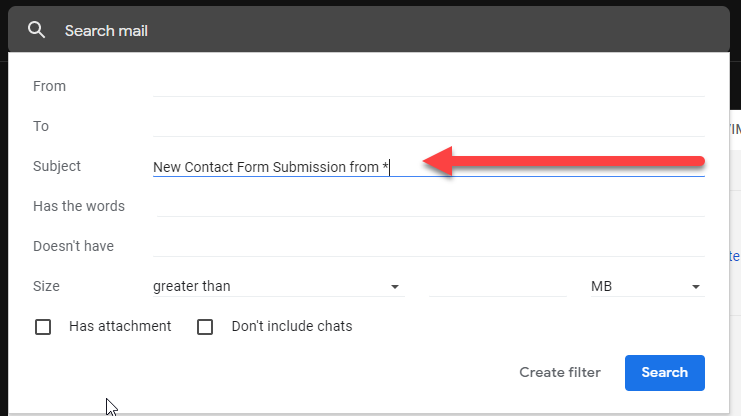
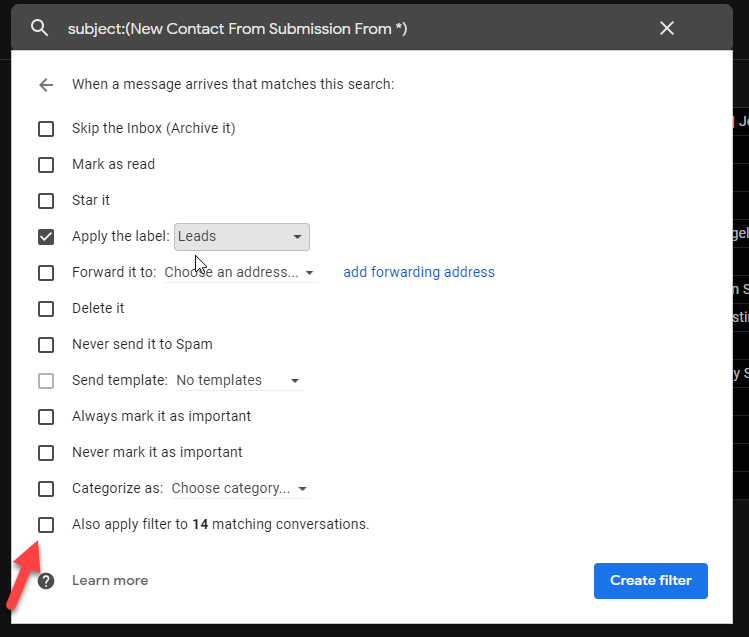
Lets say you want to automatically label all emails that come from your website’s contact form with the Lead label. For this example, we will say that all of the contact form submission emails have the same subject structure (ex: New Contact Form Submission from John Doe). We will create our filter using the subject and a wild card (figure 4). Notice we left out the senders name on the subject line and replaced it with an *. The * is considered a wild card. You use these when that information can change.
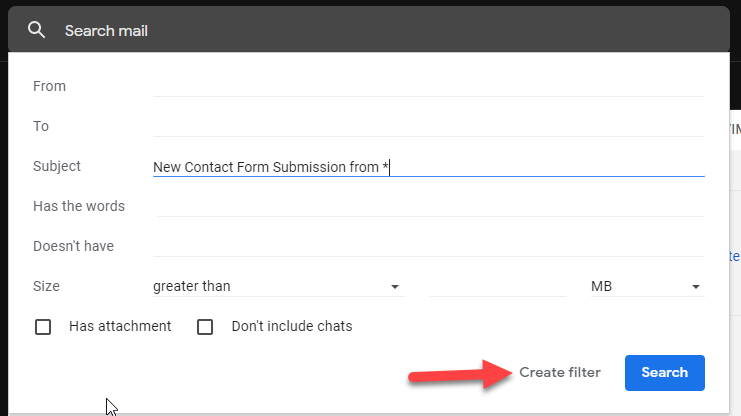
Next, you will want to click the Create Filter link (figure 5).
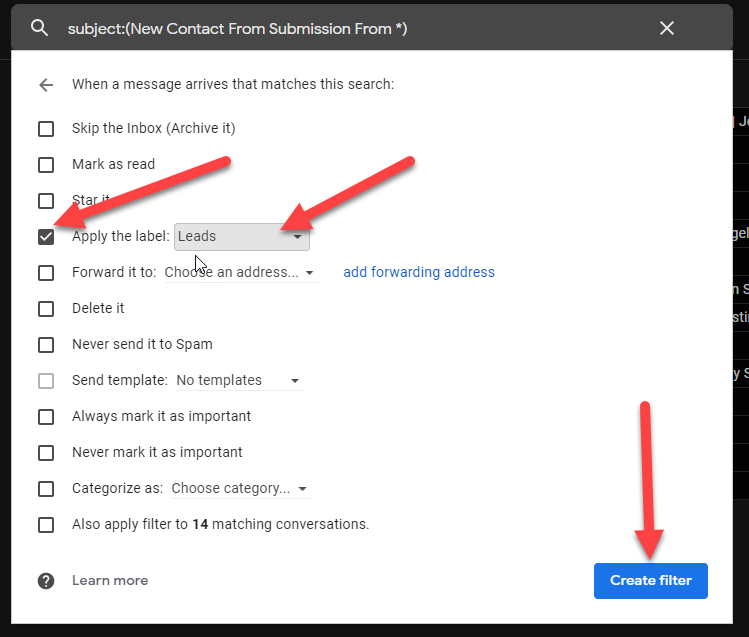
Now, check the box next to Apply the Label and in the drop down select the label you want – Leads in this example. Then click the Create Filter button (figure 6). Note: If you want to apply this filter to existing emails that meet the criteria they you would also want to check the box next to “Also apply filter to [#] matching conversations (figure 6.1).
Figure 4
Figure 5
Figure 6
Figure 6.1
Now, when you receive an email that meets this criteria it will automatically add the Leads label to your email (figure 7).